
Google IoT Core and Avaya OneCloud CPaaS Integration Guide
Google IoT Core and Avaya OneCloud CPaaS Integration Guide
Introduction
Avaya OneCloud CPaaS was intuitively designed and offers a robust suite of features making it the go-to platform for developers looking to quickly and effectively build what they need, and integrate the project seamlessly into their existing communications system.
If you’re looking for a way to augment your communications capabilities as you derive vital data from Google’s Cloud IoT Core platform, then you’ve come to the right place. This integration guide will help you pair your Zang and GCP accounts, as well as take you through each step from the start of your project, to device registry, Pub/Sub creation and more.
Good luck, and happy building!
Introduction
Creating an account
Create a project
Service account
Create a device registry
Create a pub/sub topic
Create a pub/sub subscription
Register Zang
Code samples
Add a device
Publish an event
Subscribe a topic
Integration with Zang
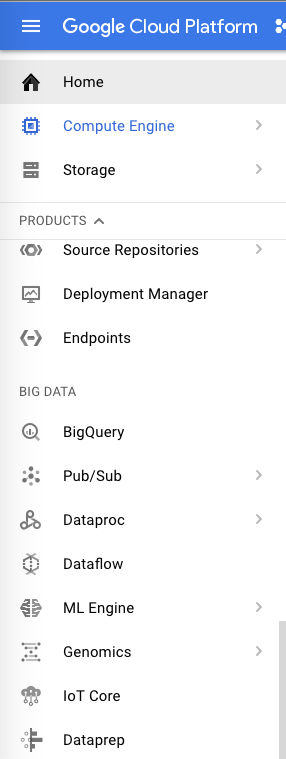
Creating an account
Step 1
This integration requires you to have an account on the Google Cloud Platform.
google-iotCreate a project
Step 2
You will need to create a project which will be used to hold all related work. Once you've created the project, you will have a ProjectID.

Service account
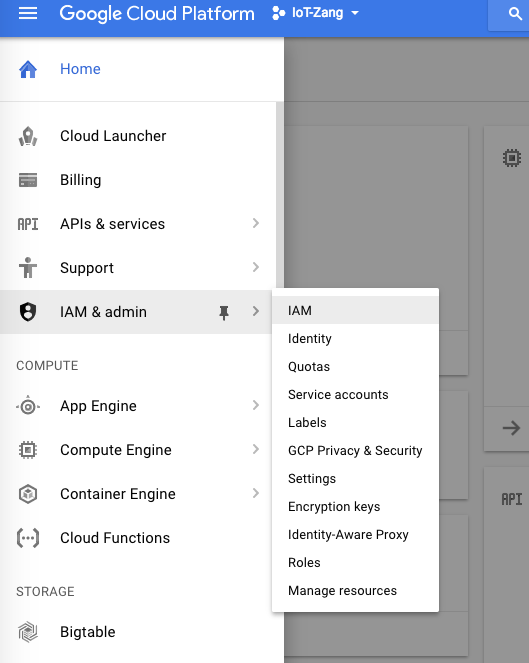
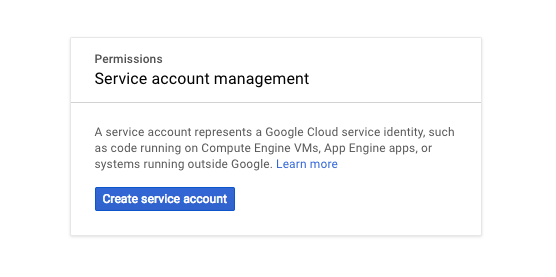
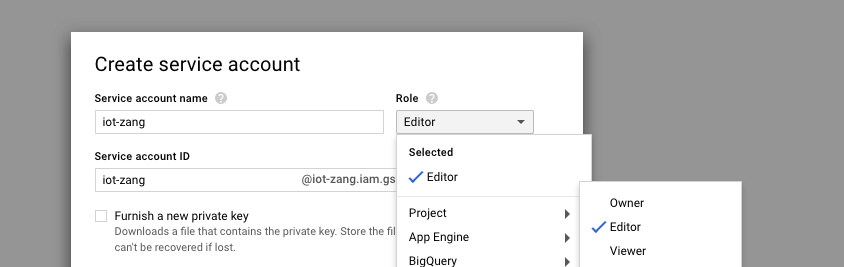
Step 3
You now have a have a project named IoT-Zang. Expand the top left navigation button, navigate to IAM & Admin. Select Service accounts.
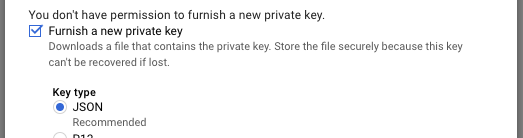
Follow the guide to create a service account with at least “Editor” permission to IoT Core/PubSub and have Furnish a new private key option checked.
After creation, you should have downloaded a .json key file. Rename it to gce-key.json
Create a device registry
Step 4
Navigate to the IoT Core section in the left panel.
You will create a device registry which is a store of the devices you want to integrate.
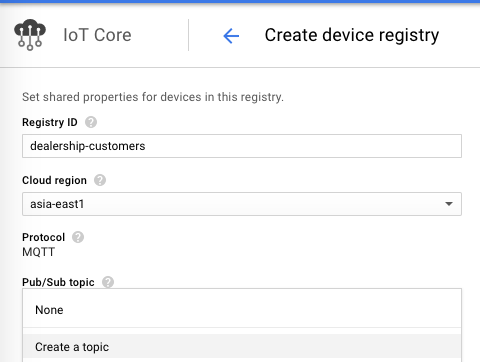
Ex: Create a device registry named “dealership-customers”
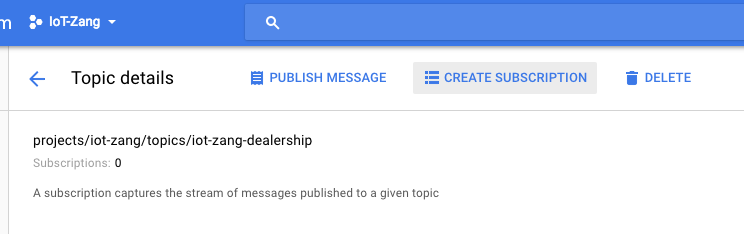
Create a pub/sub topic
Step 5
A topic is like a channel where the devices in this registry share information. You can either create a topic in IoT Core section or in Google cloud pub/sub. (Note: You have to have IAM permission on pub/sub)
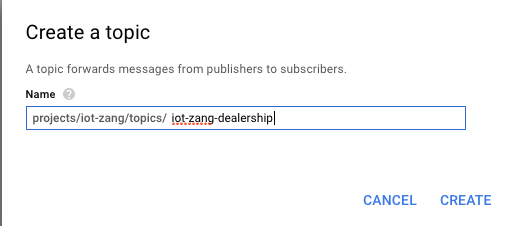
Ex: Create a topic named "iot-zang-dealership"
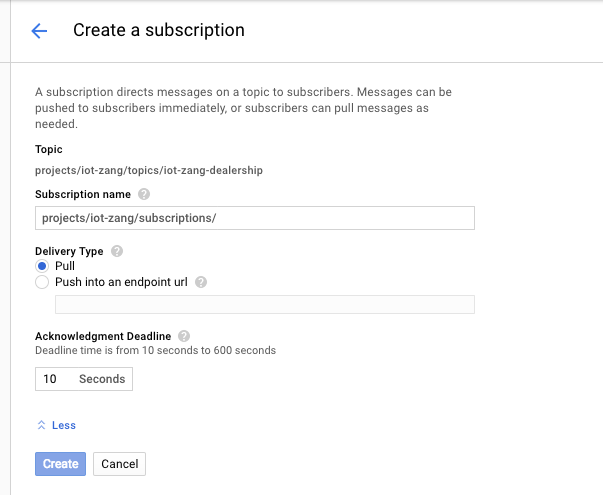
Create a pub/sub subscription
Step 6
Click into the topic just created and find CREATE SUBSCRIPTION in the top panel.
Name your subscription.
For example: projects/iot-zang/subscriptions/iot-zang-sub
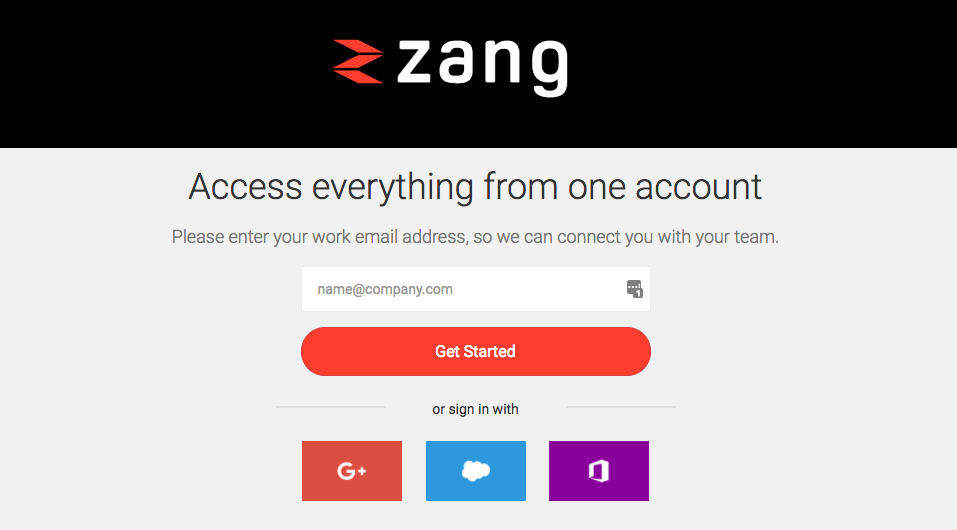
Register Zang
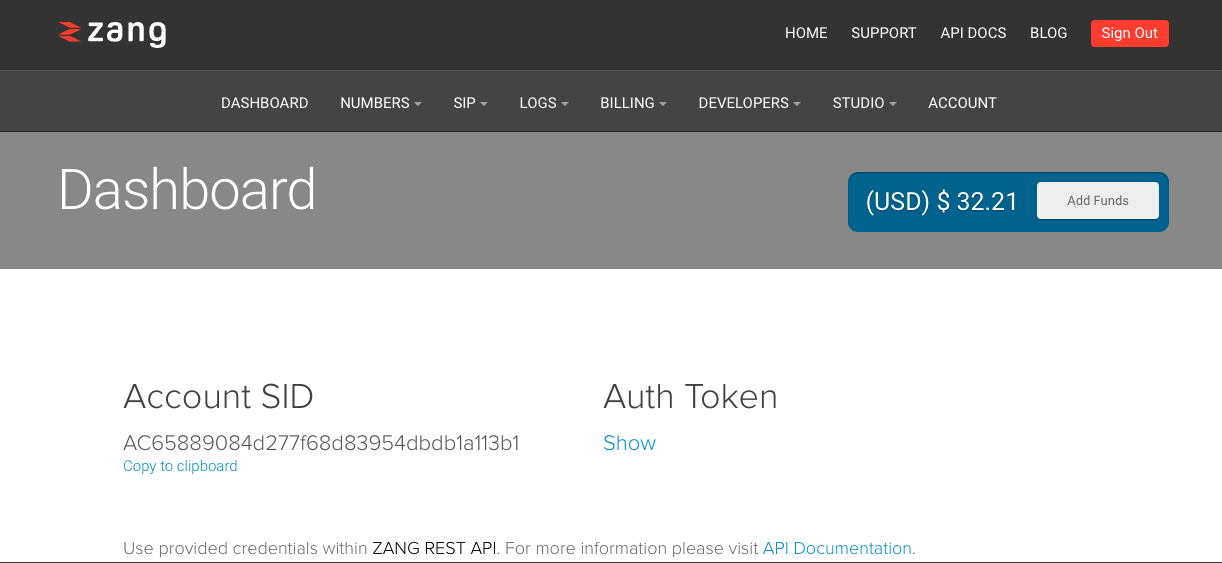
Step 7
Log in to your Avaya OneCloud CPaaS Dashboard to access your Account SID and Auth Token. You will need this pair of tokens to use the Avaya OneCloud CPaaS API.
Create a number that you can use to call and send messages.
Code samples
Add a device to a registry
The following is a Node.js example of a workflow with Zang + Google IoT.IoT core will provide an API to add a new device to registry.
You will need the following:
• apiKey: Check your api credentials in your cloud console.
• serviceAccountJson: Path of the private JSON key we created in Step 3 — gce-key.json
• rsaCertificateFile: Path of the rsa_cert.pem
A device needs a RS256/ES256 key pair to authenticate. For example, command to create a RS256 key pair.
openssl req -x509 -newkey rsa:2048 -keyout rsa_private.pem -nodes -out \ rsa_cert.pem -subj "/CN=unused"Add a device
Code Sample
// Returns an authorized API client by discovering the Cloud IoT Core API with
 // the provided API key.
 function getClient (apiKey, serviceAccountJson, cb) {
     const serviceAccount = JSON.parse(fs.readFileSync(serviceAccountJson));
     const   jwtAccess = new google.auth.JWT();
   jwtAccess.fromJSON(serviceAccount);
 // Note that if you require additional scopes, they should be specified as a
 // string, separated by spaces.
   jwtAccess.scopes = 'https://www.googleapis.com/auth/cloud-platform';
 // Set the default authentication to the above JWT access.
   google.options({ auth: jwtAccess });
   const discoveryUrl = `DISCOVERY_API}?version=${API_VERSION}&key=${apiKey}`;
   google.discoverAPI(discoveryUrl, {}, (err, client) => {
     if (err) {
       console.log('Error during API discovery', err);
       return undefined;
     }
     cb(client);
   });
 }

 function createRsaDevice (client, deviceId, registryId, projectId, cloudRegion,
 rsaCertificateFile) {
 // [START iot_create_rsa_device]
 // Client retrieved in callback
 // getClient(apiKey, serviceAccountJson, function(client) {...});
 // const cloudRegion = 'us-central1';
 // const deviceId = 'testDevice001';
 // const projectId = 'iot-zang';
 // const registryId = 'dealership';
   const parentName = `projects/${projectId}/locations/${cloudRegion}`;
   const registryName = `${parentName}/registries/${registryId}`;
   const body = {
     id: deviceId,
     credentials: [
       {
         publicKey: {
           format: 'RSA_X509_PEM',
           key: fs.readFileSync(rsaCertificateFile).toString()
         }
       }
     ]
   };

   const request = {
     parent: registryName,
     resource: body
   };
   console.log(JSON.stringify(request));
   client.projects.locations.registries.devices.create(request, (err, data) => {
     if (err) {
       console.log('Could not create device');
       console.log(err);
     } else {
       console.log('Created device');
       console.log(data);
     }
   });
 // [END iot_create_rsa_device]
 }

 getClient(apiKey, serviceAccountJson, function (client) {
   console.log('success created client');
   createRsaDevice (client, deviceId, registryId, projectId, cloudRegion, rsaCertificateFile);
 });
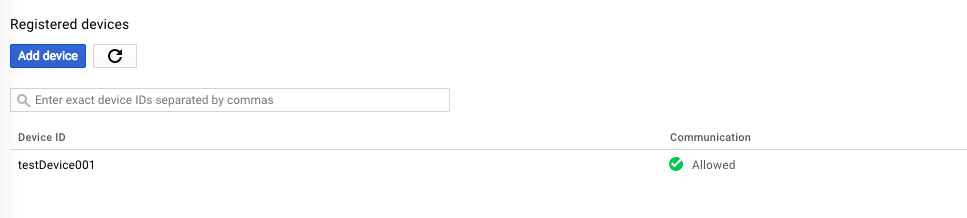
If successfully done, you should be able to see a new device appear on your registry list.
Publish an event
Publish an event to IoT Core
Google IoT use standard MQTT to pu
b/sub events.
Scenario: Your car is installed with a chip which reads all the sensor data. A client application in your car needs to connect to topic with MQTT:
Code Sample
function createJwt (projectId, privateKeyFile, algorithm) {
 // Create a JWT to authenticate this device. The device will be disconnected
 // after the token expires, and will have to reconnect with a new token
 // The audience field should always be set to the GCP project id
 const token = {
    'iat': parseInt(Date.now() / 1000),
    'exp': parseInt(Date.now() / 1000) + 20 * 60,  // 20 minutes
    'aud': projectId
  };
  const privateKey = fs.readFileSync('./rsa_private.pem').toString()
  return jwt.sign(token, privateKey, { algorithm: algorithm });
 }

 // The mqttClientId is a unique string that identifies this device. For Google
 // Cloud IoT Core, it must be in the format below.
 const mqttClientId = `projects/${project_id}/locations/${cloud_region}/registries/${registry_id}/devices/${device_id}`;

 // With Google Cloud IoT Core, the username field is ignored, however it must be
 // non-empty. The password field is used transmit a JWT to authorize the
 // device. The "mqtts" protocol causes the library to connect using SSL, which
 // is required for Cloud IoT Core.

const connectionArgs = {
   host:mqtt_bridge_hostname,
   port: mqtt_bridge_port,
   clientId: mqttClientId,
   username: 'unused',
   password: createJwt(project_id,private_key_file,algorithm),
   protocol: 'mqtts'
 };
 // Create a client, and connect to the Google MQTT bridge.
 const client = mqtt.connect(connectionArgs);
Send your car’s data to Topic:
{
 “engineOilLevel”: 0.3,
 “tirePressure”: 32,
 “transmissionOilLevel”: 0.99,
 “brakeDiskLeft”: 0.9,
 ...
 ...
}
We use the Client to publish a payload to event topic reporting the carStatus:
// The MQTT topic that this device will publish telemetry data to. The MQTT
// topic name is required to be in the format below. Note that this is not the
// same as the device registry's Cloud Pub/Sub topic.
const mqttTopic = `/devices/${device_id}/events`;
const carStatus = {
   engineOilLevel: 0.3,
   tirePressure: 32,
   transmissionOilLevel: 0.99,
   brakeDiskLeft: 0.9
}
// Publish numMessages messages asynchronously, starting from message
// messageCount.

function publishMessage (data) {
 data = carStatus; //
 const payload = JSON.stringify(data);
 // Publish "payload" to the MQTT topic. qos=1 means at least once delivery.
 // Cloud IoT Core also supports qos=0 for at most once delivery.
 console.log('Publishing message:', payload);
 client.publish(mqttTopic, payload, { qos: 1 });
}
Subscribe a topic
Subscribe a topic to Pull events
A simple subscription sample code that runs on your application server.
Scenario: Your car published a message with payload of couple status data. Your server is sitting to pull such messages to execute the logics.
Code Sample
Sample Subscription:
 var gcloud = require('google-cloud')({
 projectId: ProjectId,
 keyFilename: serviceAccount
 });

 var pubsub = gcloud.pubsub();
 var subscription = pubsub.subscription(PubSubSubscriptionName);
Read Messages:
On subscription, message sent from device which is forwarded to related topic will be read.
 subscription.on('message', function(message) {
 // Called every time a message is received.
 // message.id = ID used to acknowledge its receival.
 // message.data = Contents of the message.
 // message.attributes = Attributes of the message.
    console.log(message);
 // sendReminderMessage()
    message.ack();
 });
Integration with Zang
Integration with Zang
In this scenario, the server can be based on the message content to do interesting things, such as:
Sending SMS to dealer saying
“Customer Alice’s engine oil is running low at 20%, custom ID: 1234567 ”
Sending SMS to Alice as a reminder
“Alice, my engine oil level is only 20%, please contact your dealer to schedule maintenance soon”
Sample Code to send SMS with Zang:
 function sendReminderMessage(data) {

 const zang = require('zang-node');
 const enums = zang.enums;

 const connector = new zang.SmsConnector({
    accountSid: '{AccountSid}',
    authToken: '{AuthToken}'
 });

 //send sms message
 connector.sendSmsMessage({
    to: '+123456789',
    from: ZangNumber,
    body: " Alice, my engine oil level is only 20%, please contact your dealer to schedule maintenance soon",
    statusCallback: 'http://mycallback.url.com',
    statusCallbackMethod: enums.HttpMethod.GET,
    allowMultiple: true
 }).then(function (data) {
    console.log(data);
 });

 }

 subscription.on('message', function(message) {
 // Called every time a message is received.
 // message.id = ID used to acknowledge its receival.
 // message.data = Contents of the message.
 // message.attributes = Attributes of the message.
    let data = JSON.parse(message.data);
    if (data.engineOilLevel < 0.6 ) {
       sendReminderMessage();
    }
    message.ack();
});